No-Fuss Sourdough Bread Unfed Starter Recipe
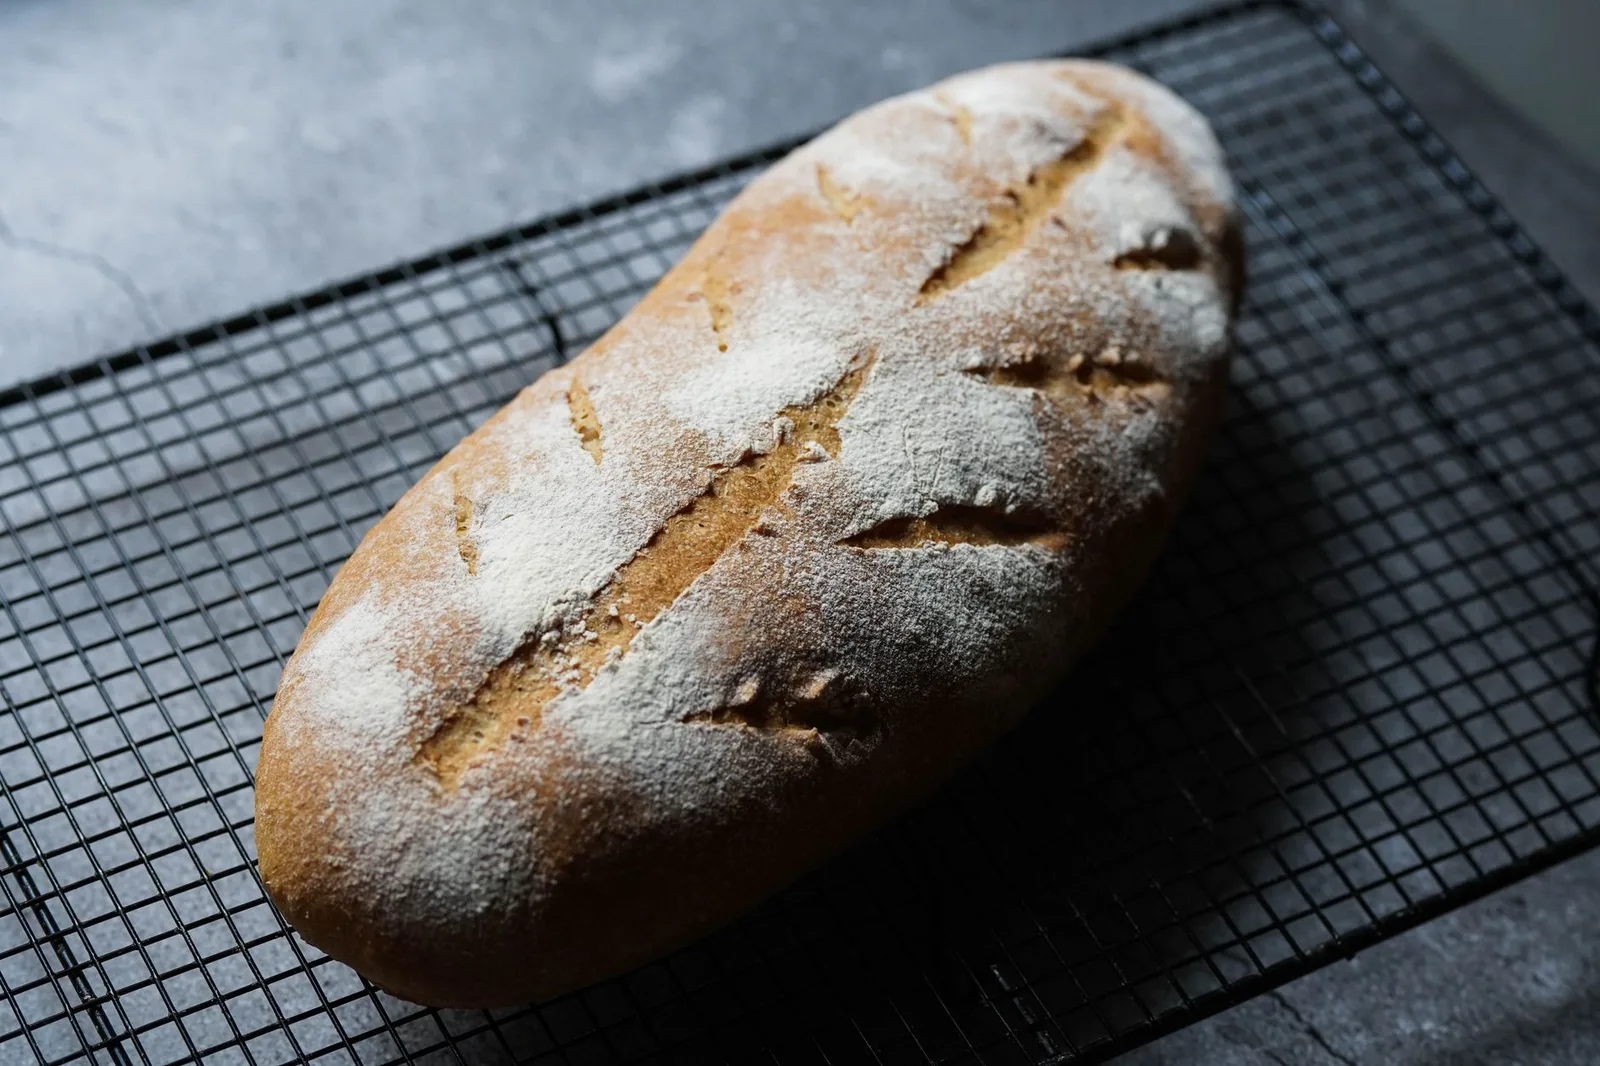
This rustic sourdough bread uses unfed starter straight from the refrigerator, eliminating the need for a multi-step feeding schedule. By adjusting your bulk fermentation times and hydration slightly, you can bake a deeply flavorful, crusty loaf with a beautifully open crumb. The entire process takes about 18 to 24 hours from mixing to slicing, mostly consisting of hands-off fermenting time.
Every home baker knows the guilt of discarding perfectly good sourdough starter during the weekly feeding routine. While quick-use recipes like pancakes, waffles, and crackers are excellent ways to clear out your jar, you can actually bake a magnificent, crusty loaf of artisanal bread using your cold, sleep-deprived culture. Baking sourdough bread with unfed starter is not only possible, but it also yields a unique flavor profile that many bakers prefer over traditional active-starter loaves.
The secret lies in understanding how the yeasts and lactic acid bacteria behave when they are dormant. When you pull your starter straight from the refrigerator, the wild yeast population is sluggish, while the acid-producing bacteria have had days to build up complex, tangy organic acids. This means your dough will rise more slowly, but it will develop a remarkably deep, complex, and sour flavor. By extending the fermentation window and managing your dough temperature, you can achieve a spectacular rise and a crisp, blistered crust without the hassle of a multi-step feeding schedule.
This recipe is designed for the busy home cook who wants real, artisanal bread on a weeknight schedule. We will skip the levain stage entirely and mix our dough using cold, unfed discard. Because the starter is acidic and gluten-softening enzymes are highly active in older starters, we will use a slightly lower hydration rate and a strong bread flour to ensure the dough maintains its structural integrity and shapes beautifully.
Contents
Key Takeaways
- Total Time: 18 to 24 hours (mostly hands-off fermentation)
- Difficulty Level: Intermediate (requires patience and temperature monitoring)
- Storage Life: Up to 4 days at room temperature in a paper bag, or freeze for 3 months
- Best Feature: Intense, complex sour flavor with a highly blistered, shatteringly crisp crust
Recipe Card
Ingredients
- 150 grams unfed sourdough starter (straight from the refrigerator, 1 to 2 weeks old)
- 350 grams cool water (ideally filtered, 65°F to 70°F)
- 500 grams unbleached bread flour (at least 12.7% protein content)
- 10 grams fine sea salt
- 15 grams warm water (for dissolving the salt)
- Rice flour (for dusting the proofing basket)
Instructions
- Dissolve the Starter: In a large mixing bowl, weigh out 150 grams of unfed sourdough starter straight from the fridge. Pour in 350 grams of cool filtered water. Use a Danish dough whisk or your hands to break up the starter until the water is milky and mostly smooth.
- Autolyse (Rough Mix): Add 500 grams of bread flour to the wet mixture. Stir with a sturdy spoon or spatula until no dry patches of flour remain. The dough will look shaggy and wet. Cover the bowl with a damp towel or plastic wrap and let it rest at room temperature (70°F to 74°F) for 45 minutes to allow the flour to fully hydrate.
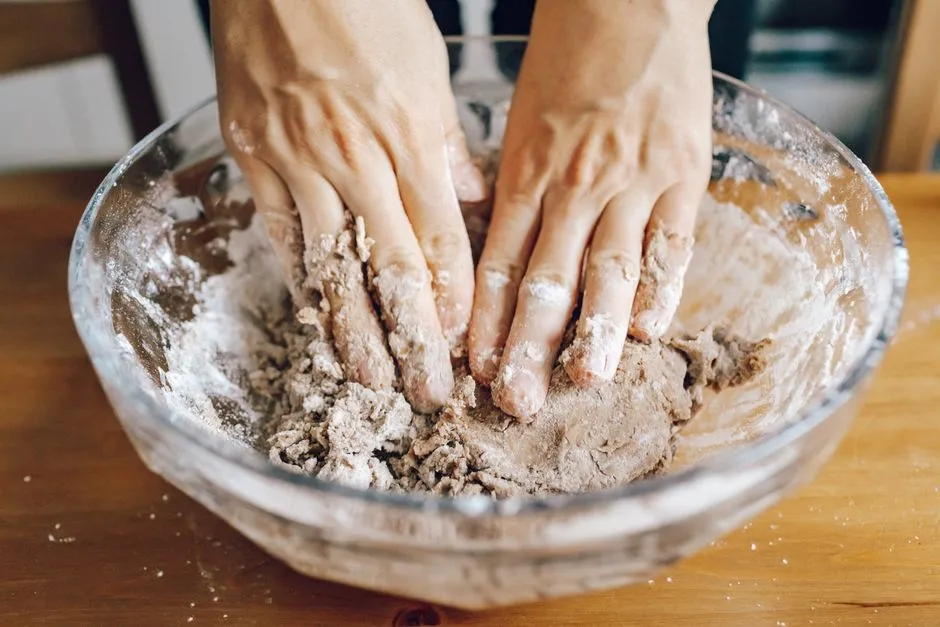
- Add Salt: Sprinkle 10 grams of fine sea salt over the dough, followed by 15 grams of warm water. Wet your hands and pinch the salt and water into the dough, squeezing it through your fingers until the liquid is fully incorporated and the dough begins to tighten.
- Stretch and Fold Cycles: Over the next 2 hours, perform 4 sets of stretch-and-folds spaced 30 minutes apart. To perform a fold, wet your hands, grab the North side of the dough, stretch it upward gently without tearing, and fold it over the center. Rotate the bowl 90 degrees and repeat for the East, South, and West sides. Cover the bowl between sets.
- Bulk Fermentation: After the final stretch-and-fold, cover the bowl tightly. Let the dough ferment at room temperature (around 70°F). Because the starter was unfed, this bulk fermentation will take longer than usual—typically 8 to 12 hours. Look for the dough to double in size, become domed at the edges, and show visible air bubbles beneath the surface.
- Pre-shape and Bench Rest: Gently ease the fermented dough out of the bowl onto a lightly floured work surface. Using a bench knife, fold the edges inward to form a loose round. Flip the dough over so the seam is down. Let it rest uncovered on the counter for 20 minutes to relax the gluten.
- Final Shape: Dust a banneton or a medium bowl lined with a linen towel with rice flour. Flip the rested dough ball over. Pull the bottom edge down and fold it up to the middle. Pull the left and right sides outward, then fold them over each other like an envelope. Roll the dough from the top down into a tight cylinder. Drag the cylinder toward you on the un-floured counter to build surface tension.
- Cold Retard (Overnight Proof): Place the shaped dough seam-side up into the prepared banneton. Slip the basket into a plastic bag to prevent drying and place it in the refrigerator (38°F to 40°F) for 12 to 16 hours. This cold proof firms up the dough and intensifies the sour flavor.
- Preheat the Oven: 1 hour before baking, place a heavy 4-to-6-quart Dutch oven (with its lid on) on the middle rack of your oven. Preheat the oven to 500°F (260°C).
- Score and Bake: Turn the cold dough out onto a sheet of parchment paper. Dust the top with a little white flour and rub it smoothly over the surface. Use a sharp razor blade or bread lame to score a single deep slash down the center at a 45-degree angle. Carefully lower the parchment and dough into the hot Dutch oven. Cover with the lid and bake at 450°F (232°C) for 25 minutes.
- Finish Baking: Carefully remove the lid of the Dutch oven. Reduce the oven temperature to 425°F (218°C) and bake for an additional 18 to 20 minutes, until the crust is a deep mahogany brown. Transfer the loaf to a wire rack and cool completely for at least 2 hours before slicing.
Understanding the Science of Unfed Starter
Using an unfed starter changes the chemical dynamics of your dough. When a starter sits in the refrigerator for days or weeks without being fed, the wild yeast (Saccharomyces exiguus) enters a dormant state due to the cold temperatures and the depletion of fermentable sugars. However, the lactic acid bacteria (Lactobacillus sanfranciscensis) continue to work slowly, converting simple sugars into lactic and acetic acids.
When you mix this highly acidic, yeast-dormant starter into fresh flour and water, two main things happen:
- Slower Fermentation: The dormant yeast cells require several hours to wake up, warm up, and begin multiplying. This naturally stretches out your bulk fermentation time, which is highly beneficial for flavor development.
- Gluten Degradation: Protease enzymes, which break down gluten proteins, are highly active in acidic environments. If your starter is extremely old (older than 3 weeks without a feed), it can degrade the gluten in your new dough too quickly, resulting in a sticky, slack dough that struggles to hold its shape during baking.
To balance these factors, this recipe uses a high-protein bread flour to provide a sturdy gluten network that can withstand the acidity of the unfed starter. We also lower the hydration to 70% (excluding the starter's water content) to keep the dough manageable and easy to shape.
How Unfed Starter Affects Bread Texture and Flavor
Baking with an active, freshly fed starter yields a mild, slightly sweet loaf with a very open, wild crumb structure and a high, airy rise. When you choose to bake sourdough bread with unfed starter, you are intentionally trading a bit of that open, airy volume for a denser, more uniform crumb and an incredibly robust flavor.
| Starter Condition | Average Bulk Time (70°F) | Crumb Structure | Flavor Profile | Crust Characteristics |
|---|---|---|---|---|
| Active / Fed (4-8 hours old) | 4 to 6 hours | Wild, open, large irregular holes | Mildly tangy, milky, sweet undertones | Thin, golden-brown, crispy |
| Unfed Discard (1-7 days old) | 8 to 12 hours | Moderately open, uniform, soft | Distinctly sour, complex, yeasty | Thick, blistered, deep mahogany |
| Old Discard (2-4 weeks old) | 12 to 18 hours | Tight, dense, sandwich-style | Sharp, highly acidic, vinegar-like notes | Very thick, dark, chewy |
As shown in the table, using an unfed starter that is less than a week old provides the perfect sweet spot for home bakers. You get a highly manageable dough with a beautiful, moderately open crumb and a rich, traditional sourdough tang that is hard to replicate with young, active starters.
Ingredient Notes and Substitutions
The Flour Choice
Because the acidity of unfed starter weakens gluten over long fermentation periods, using the right flour is non-negotiable. Avoid using standard all-purpose flour for this recipe, as its lower protein content (typically 10% to 11%) cannot support the long rise. Opt for a high-quality, unbleached bread flour with a protein content of 12.7% or higher. If you want to add whole grains, replace up to 50 grams of the bread flour with whole wheat or rye flour; any more than that will make the dough too heavy for the sluggish yeast to lift.
Water Temperature and Quality
Chlorinated tap water can inhibit the wild yeasts in your unfed starter, which are already in a weakened state. Use filtered, spring, or distilled water. Keep the water temperature cool (around 65°F to 70°F). While warm water speeds up yeast activity, it also accelerates gluten breakdown by activating enzymes too quickly. A slow, cool rise is your best defense against flat bread.
Salt Selection
Fine sea salt is preferred because it dissolves quickly in the small amount of added water. Avoid using iodized table salt, as iodine can impart a chemical flavor and slightly hinder fermentation. If using kosher salt, ensure it is fully dissolved before incorporating it into the dough.
Save it to Pinterest so you can find it again next time you're planning dinner — and follow along for a new easy recipe a few times a week.
Step-by-Step Shaping Techniques for Slack Dough
Because dough made with unfed starter can feel slightly more extensible (stretchy) and less elastic (springy) than active-starter dough, proper shaping is critical to prevent the loaf from flattening out when it hits the hot Dutch oven.
The Envelope Fold Method
To shape a classic oval loaf (batard), start by flattening your rested dough round into a rough rectangle on a lightly floured surface. Fold the bottom third of the dough up toward the center, then fold the left and right sides over the middle, overlapping them slightly like an envelope. Grab the top edge of the rectangle and roll it down tightly away from you, tucking the edges in as you roll. This creates a tight, spiral-bound cylinder with excellent surface tension.
Building Surface Tension
Once your dough is rolled into a cylinder, place your hands behind the dough on the un-floured work surface. Cup your hands around the far side of the dough and gently drag it toward your body. The friction against the counter will pull the outer skin of the dough tight. Rotate the dough 90 degrees and repeat this dragging motion two or three times. Be careful not to tear the outer skin; if the dough begins to stick to your hands, dust them with a tiny amount of bread flour.
Common Mistakes to Avoid
- Using starter with a dark liquid layer (hooch): If your unfed starter has a dark, watery layer on top, it is highly acidic and starving. Stirring this liquid in will degrade your dough's gluten instantly. Pour off the hooch and scrape away the gray top layer before weighing out your starter.
- Short-cutting the bulk fermentation: Sluggish yeast takes time to multiply. If you shape the dough before it has fully doubled and developed bubbles, your loaf will turn out dense, gummy, and under-proofed, with a flat profile. Trust the visual cues over the clock.
- Baking in a cold oven: Without the explosive gas production of active yeast, your bread relies heavily on "oven spring" from steam. You must preheat your Dutch oven at 500°F for a full hour to ensure maximum heat transfer when the dough is loaded.
- Slicing the bread while it is hot: It is incredibly tempting to cut into a warm loaf, but baking continues even after the bread is out of the oven. Slicing too early releases trapped steam, turning the interior crumb wet, sticky, and gummy. Let it cool on a wire rack for at least two hours.
- Failing to use rice flour for the basket: High-acid doughs tend to be stickier. Standard wheat flour will absorb into the dough during the overnight cold proof, causing it to stick to your banneton. Rice flour does not contain gluten and will not stick, ensuring a clean release.
Storage, Freezing, and Reheating Instructions
Sourdough bread made with unfed starter actually keeps better than yeast bread due to its high acidity, which naturally retards mold growth and staling. Store your cooled loaf cut-side down on a wooden cutting board, or keep it in a paper bag at room temperature for up to 4 days. Avoid storing sourdough in plastic bags, as this traps moisture and turns the crisp crust soft and leathery.
To freeze the bread, let it cool completely, then slice it. Wrap the entire sliced loaf, or individual slices, tightly in plastic wrap, followed by a layer of aluminum foil. Freeze for up to 3 months. You can toast individual slices directly from the freezer for an instant, fresh-baked taste.
To reheat a whole, day-old loaf and restore its crispy crust, mist the exterior lightly with water. Place the loaf directly on the middle rack of an oven preheated to 350°F (177°C) for 10 to 12 minutes. The moisture will steam the crust, making it shatteringly crisp again, while warming the interior crumb back to its original soft state.
Frequently Asked Questions
Can I use unfed starter that has been in the fridge for a month?
It is not recommended for a direct loaf. Starter that has been neglected for over two weeks is highly acidic and contains very little viable yeast. If you attempt to use it, the gluten in your dough will break down completely before the yeast can wake up and rise the dough, resulting in a flat, puddle-like loaf. For starters older than two weeks, perform at least one feeding cycle before baking a loaf, or use the old discard for quick-rise recipes like crackers.
Why did my sourdough loaf turn out flat and dense?
A flat, dense loaf is almost always the result of under-proofing or weakened gluten structure. Because unfed starter rises slowly, bakers often lose patience and shape the dough before bulk fermentation is complete. Ensure your dough has doubled in size and feels light and full of air before shaping. Additionally, check that you are using a high-protein bread flour to withstand the starter's acidity.
Do I need to adjust the hydration for very old starter?
Yes. If your starter is older than 10 days, it will be much more liquid and acidic than a freshly fed starter. To compensate for this, reduce the initial water in the recipe by 15 to 20 grams. This helps keep the dough manageable and prevents it from turning slack and sticky during the long bulk fermentation process.
Can I bake this recipe without a Dutch oven?
Yes, though a Dutch oven yields the best results by trapping steam to create a crispy crust. If you do not have one, you can bake the loaf on a preheated baking stone or a heavy baking sheet. To create steam, place a metal cast-iron skillet on the bottom rack of your oven during preheating. Immediately after sliding your loaf onto the baking stone, pour one cup of boiling water into the hot skillet and quickly close the oven door.
Is the sourdough tang stronger with unfed starter?
Absolutely. The sour flavor in bread comes from acetic and lactic acids produced by bacteria. When starter sits unfed in the cold refrigerator, these bacteria continue to produce acids long after the yeast has gone dormant. Using this acidic starter, combined with a long, slow bulk fermentation and an overnight cold proof, produces a highly traditional, deeply tangy sourdough flavor.
Can I add mix-ins like cheese or jalapeños to this dough?
Yes, you can easily customize this loaf. Because the fermentation is slower, it is best to laminate your mix-ins (such as sharp cheddar cheese, roasted garlic, rosemary, or pickled jalapeños) into the dough during the shaping stage. This ensures they are evenly distributed without disrupting the gluten structure during the initial stretch-and-fold cycles.
Baking with an unfed starter is a highly rewarding technique that fits perfectly into a busy lifestyle. By trading active rising speed for deep, complex flavor and a hands-off schedule, you can enjoy fresh, artisanal sourdough bread any day of the week with minimal effort and zero waste.

Founder of Simple Skillet
Aycan tests every recipe on Simple Skillet at home before it's published — real ingredients, real timing, no filler.