Pan Fried Chicken Tenders No Breading (7 Mins)
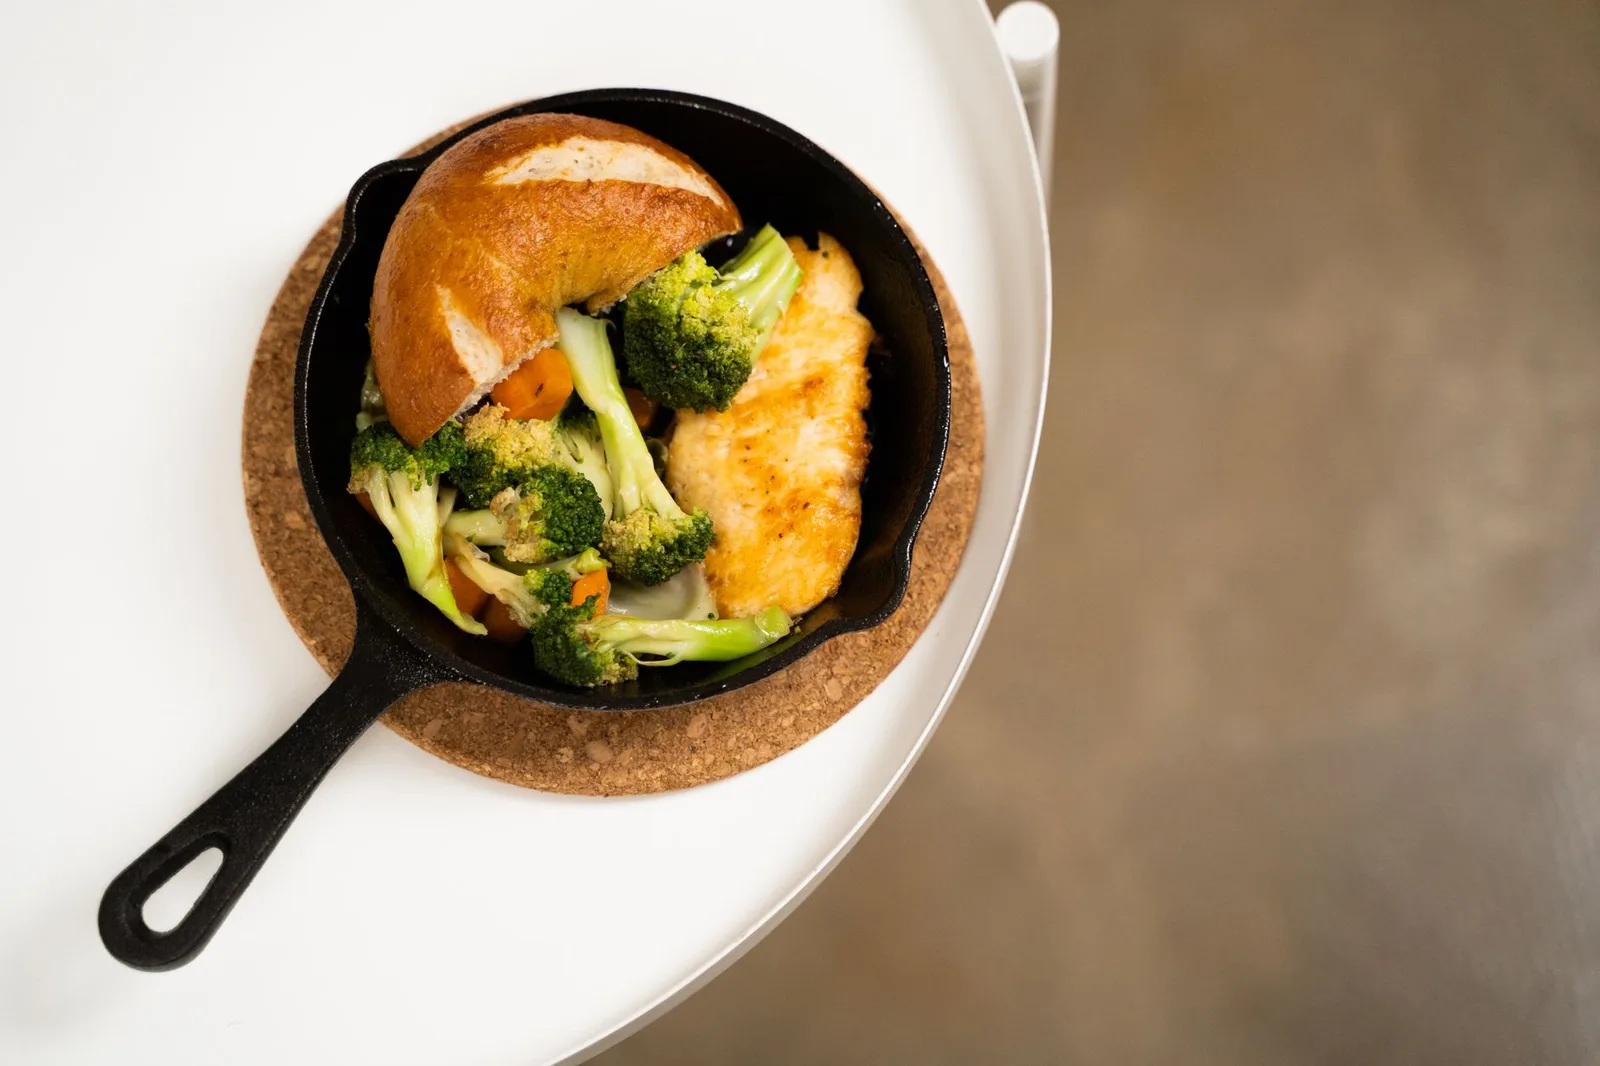
These juicy pan fried chicken tenders no breading cook in just 7 minutes on the stovetop. By skipping the flour and breadcrumbs, we use a high-heat sear and a simple garlic-herb seasoning to lock in moisture and create a beautiful golden crust. It is a fast, low-carb, and gluten-free weeknight protein perfect for meal prep, salads, or quick dinners.
When you need a fast, high-protein main dish on a busy weeknight, turning to your stovetop is the ultimate solution. While traditional tenders rely on a heavy coating of flour, eggs, and breadcrumbs, skipping that process entirely saves both time and cleanup. This recipe focuses on maximizing the natural flavor of the chicken tenderloins while keeping them incredibly tender and juicy inside.
The secret to cooking chicken tenderloins without breading lies in the pan temperature and the oil selection. Because tenderloins are lean and relatively small, they cook through rapidly. If your pan is too cool, the chicken will release its moisture, steam in its own juices, and turn dry and rubbery. By using a preheated heavy skillet and a high-smoke-point oil, you get an immediate sear that caramelizes the spices on the surface while keeping the interior succulent.This method is highly adaptable and serves as a blank canvas for your favorite spice blends. Whether you are prepping meals for the week, topping a fresh Caesar salad, or looking for a kid-friendly dinner that does not rely on frozen processed foods, these unbreaded tenders deliver maximum flavor with minimal effort.
Contents
Key Takeaways
- Total Time: 17 minutes (10 minutes prep, 7 minutes cooking)
- Difficulty: Beginner-friendly with no advanced techniques required
- Storage Life: Keeps beautifully in the refrigerator for up to 4 days
- Best Tool: A heavy 12-inch cast iron skillet or carbon steel pan
Recipe Card
Ingredients
- 1.5 lbs chicken tenderloins (about 8 to 12 pieces)
- 1 tablespoon olive oil (or avocado oil)
- 1 tablespoon unsalted butter
- 1 teaspoon garlic powder
- 1 teaspoon onion powder
- 1 teaspoon smoked paprika
- 1/2 teaspoon dried oregano
- 1/2 teaspoon kosher salt
- 1/4 teaspoon freshly cracked black pepper
- 1/4 teaspoon cayenne pepper (optional, for mild heat)
- 1 tablespoon fresh parsley, finely chopped (for garnish)
- 1/2 lemon, cut into wedges (for serving)
Instructions
- Pat the chicken dry: Remove the chicken tenderloins from their packaging and place them on a cutting board lined with paper towels. Use another paper towel to thoroughly pat the tops dry. Removing surface moisture is critical for achieving a good sear without breading.
- Remove the tendons (optional): If the white, tough tendon protruding from the end of each tenderloin bothers you, hold the tip of the tendon with a paper towel. Place a fork over the tendon, press down against the cutting board, and pull the tendon upward and out.
- Mix the seasoning blend: In a small bowl, stir together the garlic powder, onion powder, smoked paprika, dried oregano, kosher salt, black pepper, and optional cayenne pepper until fully combined.
- Season the chicken: Drizzle the olive oil over the dried chicken tenderloins. Rub the oil over all sides to coat them evenly. Sprinkle the seasoning mixture generously over both sides of the chicken, pressing lightly so the spices adhere to the meat.
- Preheat the skillet: Place a large 12-inch cast iron skillet or heavy-bottomed stainless steel pan over medium-high heat. Allow the pan to heat for 2 to 3 minutes. The pan is ready when a drop of water flicked onto the surface sizzles and evaporates instantly.
- Melt the butter: Add the butter to the hot skillet, swirling it quickly to coat the bottom of the pan as it melts and foams.
- Sear the tenders: Immediately place the seasoned chicken tenders into the hot skillet in a single layer. Leave at least a half-inch of space between each piece to prevent crowding. Work in batches if your pan is not large enough.
- Cook first side: Let the chicken cook undisturbed for 3 to 4 minutes. Do not move them around; this allows the spices to form a golden-brown crust. They are ready to flip when they release easily from the bottom of the pan.
- Flip and finish: Flip the tenders over. Cook for an additional 3 minutes, or until the thickest part of the chicken registers 165°F (74°C) on an instant-read digital meat thermometer. Refer to the USDA food safety guidelines for safe poultry temperatures.
- Rest and serve: Transfer the cooked tenders to a warm plate. Let them rest for 2 to 3 minutes to allow the juices to redistribute. Garnish with fresh chopped parsley and a squeeze of fresh lemon juice before serving.
Why This Recipe Works So Well
Cooking chicken breasts can be tricky because the meat is uneven in thickness, leading to dry outer edges before the center is fully cooked. Chicken tenderloins—the small, delicate strip of meat attached to the underside of the breast—are naturally uniform in shape and size. This uniform thickness means every single piece cooks at exactly the same rate, eliminating the guesswork of stovetop cooking.
Without a flour or breadcrumb barrier, the spices come into direct contact with the hot fat in the pan. This process blooms the spices, releasing their fat-soluble flavor compounds and creating a deeply savory, caramelized exterior. The addition of butter at the very start of cooking helps with browning because the milk solids caramelize, adding a rich, nutty depth of flavor that oil alone cannot replicate.
Essential Ingredients and Easy Substitutions
The Chicken
While chicken tenderloins are ideal for this 7-minute cook time, you can easily substitute boneless, skinless chicken breasts. To do this, slice the chicken breasts lengthwise into strips that are roughly 1 inch wide and 4 inches long. Try to keep the thickness consistent so they cook evenly in the skillet.
The Cooking Fat
We use a combination of olive oil and butter. The oil raises the smoke point, preventing the butter from burning too quickly, while the butter provides rich flavor and aids in browning. If you prefer a dairy-free option, you can substitute the butter with ghee (clarified butter), coconut oil, or simply use all avocado oil. Avocado oil is especially good for high-heat searing due to its exceptionally high smoke point.
The Seasoning Palette
The garlic, onion, and paprika blend used here is a classic crowd-pleaser, but you can customize the flavor profile to match your meal plan. Consider these quick variations:
- Italian Style: Swap the smoked paprika and oregano for a tablespoon of dried Italian seasoning and a pinch of garlic salt.
- Taco Seasoning: Use a blend of chili powder, ground cumin, dried oregano, and garlic powder for a Mexican-inspired flavor profile.
- Lemon Pepper: Combine coarse black pepper, lemon zest, garlic powder, and salt for a bright, punchy option.
Save it to Pinterest so you can find it again next time you're planning dinner — and follow along for a new easy recipe a few times a week.
Comparing Stovetop Cooking Methods
Choosing the right pan and heat level makes a massive difference in how your unbreaded chicken tenders turn out. Here is a breakdown of how different cookware affects the final texture and cooking time.
| Pan Type | Preheat Time | Average Cook Time | Texture Result | Best For |
|---|---|---|---|---|
| Cast Iron Skillet | 3 minutes | 6-7 minutes | Deep, dark crust; highly caramelized spices | Maximum flavor and crisp edges |
| Stainless Steel | 2 minutes | 7-8 minutes | Excellent browning; creates tasty pan drippings (fond) | Making a quick pan sauce afterward |
| Non-Stick Skillet | 1 minute | 8 minutes | Lightly golden; minimal crust formation | Low-fat cooking with easy cleanup |
Common Mistakes to Avoid
- Crowding the skillet: If you pack the chicken tenders too tightly into the pan, the moisture evaporating from the meat will trap steam. Instead of searing and browning, the chicken will steam, resulting in a rubbery texture and a pale, grey color. Leave at least a half-inch of space between the pieces, cooking in two batches if necessary.
- Using a cold pan: Putting seasoned chicken into a cold or lukewarm skillet allows the spices to turn soggy and prevents a crust from forming. Always heat your pan first, then add your fat, and ensure the fat is shimmering before adding the chicken.
- Moving the chicken too early: It is tempting to flip or stir the chicken constantly. For the best sear, place the tenders in the pan and leave them completely undisturbed for the first 3 to 4 minutes. The meat will naturally release from the pan surface once a proper crust has formed.
- Overcooking the meat: Because chicken tenderloins are small, they can go from perfectly juicy to dry and chalky in a matter of 60 seconds. Use a digital meat thermometer to check the internal temperature starting at the 6-minute mark. Pull them off the heat as soon as they hit 165°F (74°C).
- Skipping the resting period: Cutting into hot chicken immediately after removing it from the skillet causes all the natural juices to run out onto your plate or cutting board. Let the tenders rest for 2 to 3 minutes so the muscle fibers relax and reabsorb those juices.
How to Store and Reheat Leftovers
These pan-fried chicken tenders are fantastic for weekly meal prep because they hold their moisture well when stored properly. Allow the cooked tenders to cool completely at room temperature for about 15 to 20 minutes before packaging them.
Refrigerator Storage
Place the cooled chicken tenders in an airtight glass or plastic container. Store them in the refrigerator for up to 4 days. Keep them separate from any sauces or dressings to maintain their seasoned exterior.
Reheating Instructions
To keep the chicken from drying out during reheating, avoid using the microwave if possible. Instead, try one of these preferred methods:
- Stovetop Method (Best): Heat a splash of water, chicken broth, or olive oil in a skillet over medium-low heat. Add the chicken tenders, cover the pan with a lid, and heat for 2 to 3 minutes per side until warmed through. The steam generated inside the covered pan keeps the meat incredibly moist.
- Air Fryer Method: Preheat your air fryer to 350°F (175°C). Place the tenders in a single layer and heat for 3 to 4 minutes. This method helps restore some of the original crispness to the spiced exterior.
- Oven Method: Preheat your oven to 350°F (175°C). Place the tenders in a baking dish, add a tablespoon of water or broth to the bottom of the dish, and cover tightly with aluminum foil. Bake for 8 to 10 minutes until heated through.
Serving Suggestions for a Complete Meal
Because these chicken tenders are seasoned with a versatile spice blend, they pair beautifully with a wide variety of side dishes. Here are some of our favorite ways to serve them:
Low-Carb and Keto Pairings
Keep your meal light and healthy by serving these tenders alongside a crisp green salad tossed with a creamy garlic dressing. They also pair wonderfully with roasted asparagus, steamed broccoli drizzled with lemon butter, or a side of creamy cauliflower mash. You can slice the tenders and wrap them in large romaine lettuce leaves with avocado and a swipe of mayonnaise for a quick lunch.
Hearty Family Dinners
For a more comforting weeknight dinner, serve the tenders over a bed of garlic herb rice, buttered egg noodles, or alongside crispy roasted baby potatoes. They also make an excellent topping for a homemade bowl of mac and cheese or nestled into warm pita bread with tzatziki sauce, sliced cucumbers, and fresh tomatoes.
Frequently Asked Questions
Can I make this recipe with frozen chicken tenders?
You can use frozen chicken tenders, but they must be completely thawed before cooking. Attempting to pan-fry frozen tenders without breading will result in a wet, soggy pan as the ice melts, preventing any browning. Thaw them overnight in the refrigerator, or place them in a sealed plastic bag submerged in cold water for 30 minutes, then pat them thoroughly dry before seasoning.
Do I have to remove the white tendon before cooking?
No, removing the tendon is entirely optional. It is safe to eat, but it can become tough and chewy once cooked. If you are serving these to young children or prefer a completely tender texture, taking an extra minute to pull the tendons out using the paper towel and fork method is highly recommended.
Why did my chicken tenders release so much water in the pan?
This usually happens for two reasons: either the skillet was not hot enough when the chicken was added, or the pan was overcrowded. When too many cold chicken tenders are added to a skillet at once, the temperature of the pan drops rapidly. Instead of searing, the chicken begins to release its natural moisture and steam. Cook in batches to ensure a beautiful sear.
Can I freeze these cooked chicken tenders?
Yes, these unbreaded tenders freeze exceptionally well. Allow the cooked tenders to cool completely, then arrange them in a single layer on a baking sheet lined with parchment paper. Freeze for 1 hour until solid, then transfer them to a heavy-duty freezer bag. They will keep for up to 3 months. Thaw in the refrigerator overnight before reheating.
How do I make sure the chicken stays juicy without breading?
The key to juicy chicken is preventing overcooking. Because there is no breading to insulate the meat, direct heat cooks the chicken very quickly. Monitor the cooking time closely, use a meat thermometer to pull the chicken off the heat at exactly 165°F (74°C), and always allow the meat to rest for a few minutes before slicing.
Can I use this recipe for meal prep bowls?
Absolutely. These tenders are one of the best proteins for meal prep because they do not get soggy like breaded chicken does when stored. Slice them up after resting and distribute them into containers with roasted vegetables and your choice of grains. They taste great cold, at room temperature, or reheated.
With just a handful of pantry staples and a hot skillet, you can have a flavorful, juicy protein on the table in under twenty minutes. This simple method proves you do not need heavy batters or deep frying to create a satisfying chicken dinner the whole family will love.

Founder of Simple Skillet
Aycan tests every recipe on Simple Skillet at home before it's published — real ingredients, real timing, no filler.