Crispy Oven Baked Chicken Cutlets (Italian-Style)
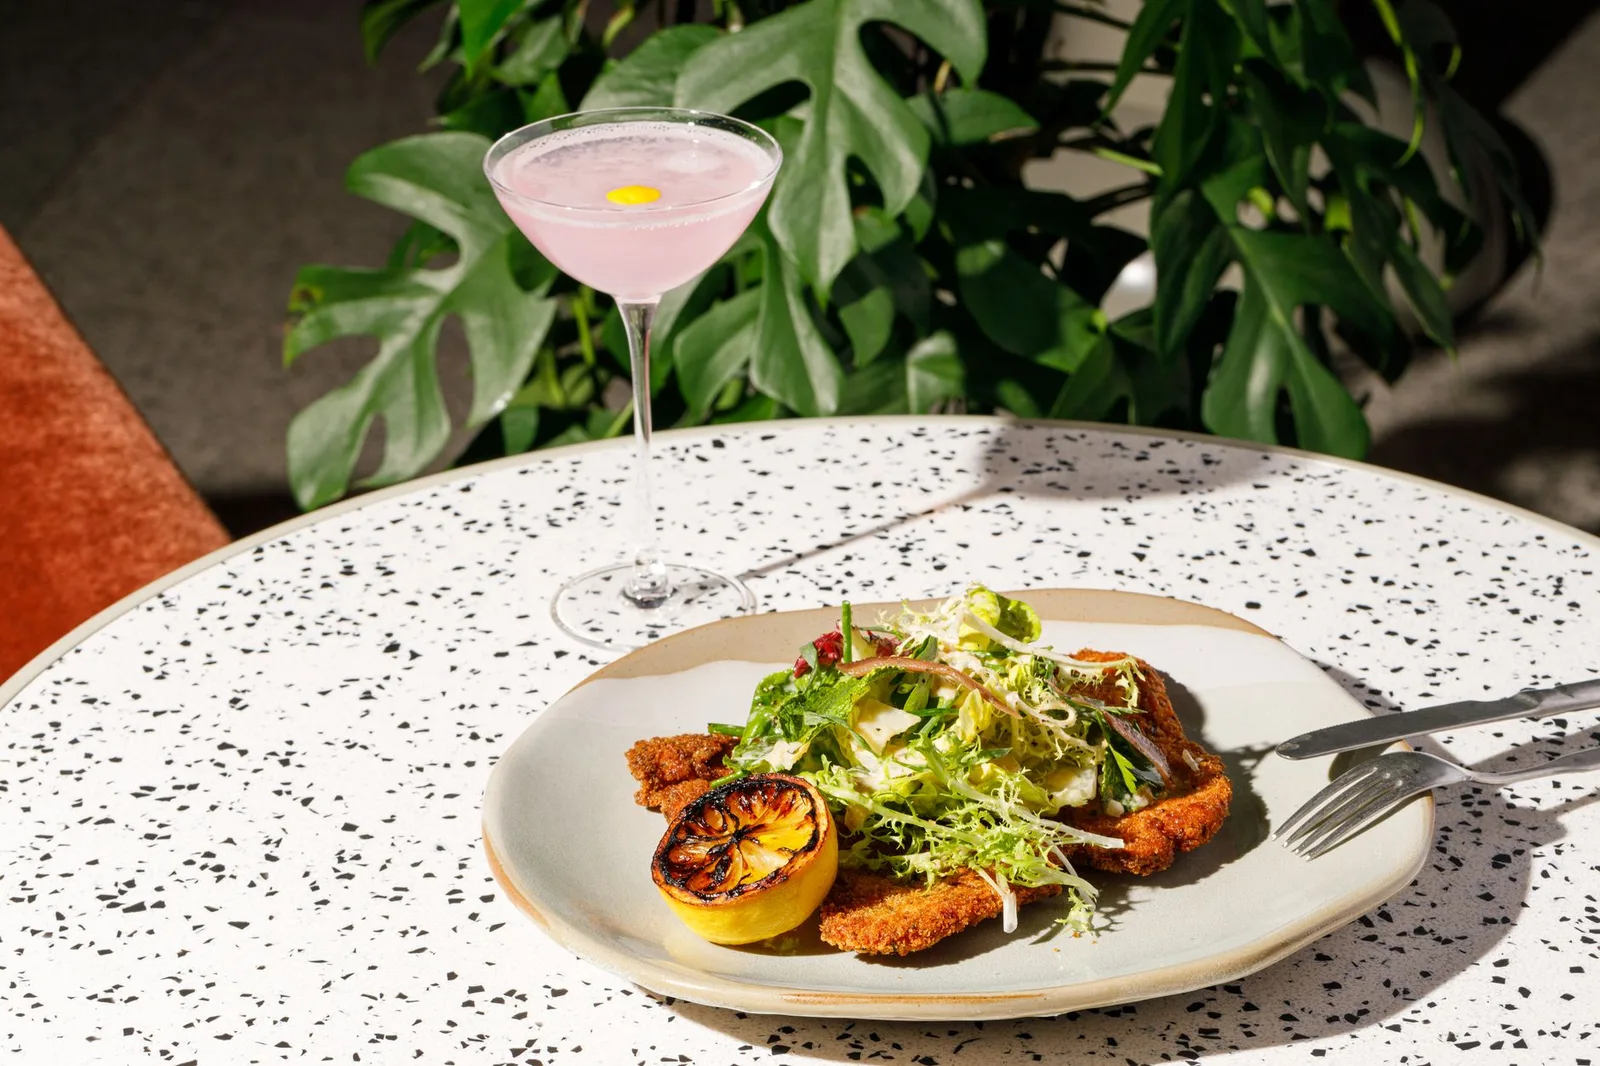
These crispy oven baked chicken cutlets deliver the satisfying crunch of traditional pan-fried Italian cutlets without the mess or excess oil. By pre-toasting the breadcrumbs and baking the chicken on a wire rack, you get a perfectly golden, shatteringly crisp crust every single time. This entire family-friendly meal goes from prep to table in just 40 minutes.
Few dishes are as universally loved as a classic Italian chicken cutlet. The contrast between a deeply seasoned, crunchy exterior and a tender, juicy interior is the ultimate comfort food. However, traditional shallow frying on a weeknight can feel like a chore. It requires standing over a hot stove, managing splattering oil, and dealing with a greasy cleanup. It is also challenging to keep the first batch warm and crispy while you finish cooking the rest of the chicken.
This recipe solves every single one of those pain points. By utilizing a few smart culinary techniques, we can mimic the high-heat environment of a frying pan right inside your oven. The result is a batch of crispy oven baked chicken cutlets that are uniformly golden, incredibly crunchy, and cooked all at once. It is a hands-off, reliable method that will quickly find a permanent spot in your weekly dinner rotation.
The secret to achieving that coveted fried texture in the oven lies in two critical, non-negotiable steps: pre-toasting your breadcrumbs and elevating the chicken on a wire rack. Standard oven heat cannot brown raw breadcrumbs quickly enough before the chicken underneath overcooks and dries out. By starting with golden-brown breadcrumbs and allowing hot air to circulate completely around the meat, we guarantee a superior crunch without a single soggy spot.
Contents
- Key Takeaways
- Recipe Card
- The Science of the Crunch: Why This Method Works
- Ingredient Deep Dive & Ingredient Notes
- Method Comparison: Baking vs. Frying vs. Air Frying
- Smart Substitutions and Variations
- Common Mistakes to Avoid
- How to Store, Freeze, and Reheat
- Meal Prep and Serving Suggestions
- Frequently Asked Questions
Key Takeaways
- Total Time: 40 minutes (15 minutes prep, 25 minutes bake)
- Difficulty Level: Easy / Beginner-friendly
- Key Technique: Pre-toasting breadcrumbs and baking on an elevated wire rack
- Storage Life: Up to 4 days in the refrigerator, or 3 months in the freezer
- Best Pairing: A bright arugula salad with lemon vinaigrette or classic pasta marinara
Recipe Card
Ingredients
- 1.5 lbs boneless, skinless chicken breasts (sliced into 4-6 thin cutlets)
- 1.5 cups Panko breadcrumbs
- 0.5 cup Italian-style breadcrumbs
- 0.5 cup freshly grated Parmesan cheese (Parmigiano-Reggiano)
- 0.5 cup all-purpose flour
- 2 large eggs
- 2 tablespoons whole milk
- 1.5 teaspoons garlic powder
- 1.5 teaspoons onion powder
- 1.5 teaspoons dried oregano
- 1.5 teaspoons kosher salt (divided)
- 0.75 teaspoon freshly cracked black pepper
- 3 tablespoons olive oil (for toasting the breadcrumbs)
- 1 lemon, cut into wedges for serving
Instructions
- Preheat and Prep: Preheat your oven to 420°F (215°C). Line a large, rimmed baking sheet with aluminum foil for easy cleanup, then place an oven-safe wire cooling rack directly inside the baking sheet. Spray the rack generously with nonstick cooking spray.
- Toast the Breadcrumbs: Heat 3 tablespoons of olive oil in a large skillet over medium heat. Add the 1.5 cups of Panko breadcrumbs. Stir constantly for 3 to 5 minutes, or until the breadcrumbs are an even, light golden brown. Remove from the heat immediately and transfer the toasted Panko to a wide, shallow bowl or pie dish to cool slightly.
- Set Up the Dredging Station: Arrange three shallow bowls in a row. In the first bowl, combine the all-purpose flour, 0.5 teaspoon of kosher salt, and 0.25 teaspoon of black pepper. In the second bowl, whisk the eggs and whole milk together until smooth. In the third bowl, combine the cooled toasted Panko, the Italian-style breadcrumbs, grated Parmesan cheese, garlic powder, onion powder, dried oregano, the remaining 1 teaspoon of kosher salt, and 0.5 teaspoon of black pepper.
- Prep the Chicken: If your chicken breasts are thick, place them on a cutting board and slice them horizontally in half to create thin cutlets. Place the cutlets between two sheets of plastic wrap and gently pound them with a meat mallet or the bottom of a heavy skillet to an even 1/4-inch thickness. Pat the cutlets completely dry with paper towels.
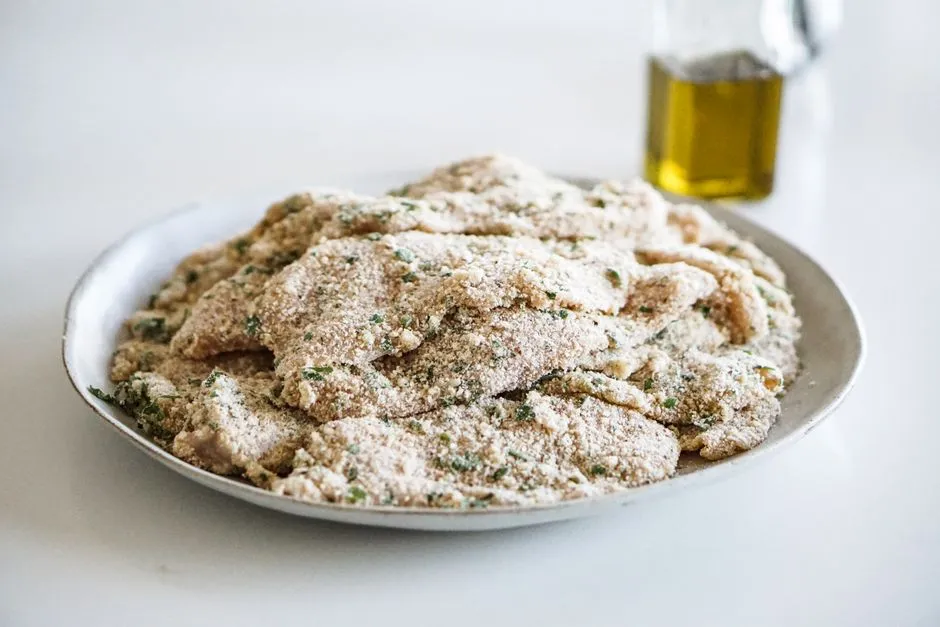
- Dredge the Cutlets: Working with one cutlet at a time, dredge it in the flour, shaking off any excess. Next, dip the cutlet into the egg mixture, ensuring it is completely coated, and let any excess egg drip back into the bowl. Finally, press the chicken firmly into the breadcrumb mixture, coating both sides thoroughly. Press down hard so the crumbs adhere well.
- Arrange and Bake: Place the breaded cutlets onto the prepared wire rack in a single layer, ensuring they do not touch or overlap. Bake in the preheated oven at 420°F (215°C) for 15 to 18 minutes. The chicken should reach an internal temperature of 165°F (74°C) when checked with a digital meat thermometer, and the crust should be deeply golden and crisp.
- Rest and Serve: Remove the baking sheet from the oven. Let the chicken cutlets rest on the wire rack for 3 to 5 minutes to allow the juices to redistribute and the crust to set. Serve hot with fresh lemon wedges squeezed over the top.
The Science of the Crunch: Why This Method Works
To understand why this oven method succeeds where other baked recipes fail, we have to look at the mechanics of heat transfer. When you fry a cutlet in hot oil, the moisture on the surface of the chicken vaporizes instantly. This rapid evaporation creates a dry, crispy barrier while the hot fat quickly browns the starches in the flour and breadcrumbs.
In a standard oven, the heat transfer is much slower because air is a poor conductor of heat compared to oil. If you place raw, oiled breadcrumbs on a baking sheet, the moisture escaping from the cooking chicken will seep into the breading before the oven heat can brown it. This results in a soggy, pale crust on the bottom and a dry, overcooked interior.
Our technique bypasses this limitation through three specific mechanisms:
1. Pre-Toasting the Breadcrumbs
By toasting the Panko breadcrumbs in a small amount of olive oil on the stovetop first, we initiate the Maillard reaction and caramelization process before the chicken ever enters the oven. The breadcrumbs are already crisp and golden, meaning the oven only needs to cook the thin chicken cutlet and melt the cheese, rather than spending precious minutes trying to brown dry breading.
2. The Elevated Wire Rack
Placing the chicken on an elevated wire rack is crucial. It allows the hot oven air to circulate freely underneath the chicken. If you bake the cutlets directly on a flat baking sheet, the moisture released from the meat will pool underneath, steaming the bottom crust. The rack ensures that both sides of the chicken dry out and crisp up simultaneously.
3. High-Heat Baking
Baking at 420°F (215°C) strikes the perfect balance. It is hot enough to rapidly cook the thin cutlets, keeping them juicy, while maintaining the crispness of the exterior. Cooking at a lower temperature, like 350°F, would prolong the cooking time, causing the meat to dry out before the breading can reach its maximum crunch potential.
Ingredient Deep Dive & Ingredient Notes
Using the right ingredients and prepping them correctly is the foundation of this recipe. Here is what you need to know about the key components:
The Chicken Cutlets
You can purchase pre-sliced chicken cutlets at the grocery store, but it is incredibly easy and much more cost-effective to make your own. Always pat the meat dry with paper towels before starting the dredging process. Excess surface moisture will prevent the flour from sticking, which in turn causes the entire breading layer to slide off the chicken after it is baked.
The Breadcrumb Blend
This recipe uses a hybrid breading approach. We combine Panko breadcrumbs with traditional Italian-style breadcrumbs. Panko, which are Japanese-style flaky breadcrumbs, provide the airy, light crunch that mimics a deep fry. Italian breadcrumbs are much finer; they fill in the small gaps between the Panko flakes, ensuring total coverage, and add a concentrated boost of herbaceous flavor.
The Seasoning and Cheese
Do not skip the freshly grated Parmesan cheese. As it bakes, the fat in the cheese melts and crisps up, acting as a delicious, savory binder. For the best flavor and texture, grate your own cheese from a block of Parmigiano-Reggiano. Pre-grated cheeses are coated in anti-caking agents, which prevent them from melting smoothly and can result in a gritty texture.
Method Comparison: Baking vs. Frying vs. Air Frying
Depending on your kitchen setup and goals, you might wonder how baking compares to other popular cooking methods. Here is a breakdown of how they stack up:
| Method | Cook Time | Texture Result | Oil Required | Ease of Cleanup | Best For |
|---|---|---|---|---|---|
| Oven Baked (This Recipe) | 15-18 mins | Extremely crispy, dry-touch crust, uniformly golden | 3 tablespoons | Very Easy (one pan, foil-lined) | Feeding a crowd, hands-off cooking, healthy weeknights |
| Traditional Pan-Frying | 6-8 mins (per batch) | Shatteringly crisp, rich, slightly oily | 0.5 cup or more | Messy (oil splatters, multiple pan washes) | Authentic, indulgent weekend dinners |
| Air Frying | 10-12 mins | Very crispy, slightly drier exterior | Cooking spray only | Medium (requires washing the basket) | Small batches, quick single-serving meals |
Save it to Pinterest so you can find it again next time you're planning dinner — and follow along for a new easy recipe a few times a week.
Smart Substitutions and Variations
This recipe is highly customizable. Here are several tested variations to suit different dietary needs or flavor preferences:
- Gluten-Free Option: To make these cutlets gluten-free, substitute the all-purpose flour with a 1:1 gluten-free baking flour blend. Replace both the Panko and Italian breadcrumbs with your favorite gluten-free breadcrumb brand (crushed gluten-free pork rinds or almond flour also work beautifully for an ultra-low-carb alternative).
- Spicy Italian: Add 0.5 teaspoon of crushed red pepper flakes to the breadcrumb mixture and 0.5 teaspoon of cayenne pepper to the flour dredge for a subtle, warming kick.
- Herby Lemon-Pesto: Instead of using the egg wash, coat the chicken cutlets in a thin layer of high-quality basil pesto before pressing them directly into the toasted breadcrumb mixture. The oil and nuts in the pesto will help the breadcrumbs adhere while infusing the meat with rich herb flavor.
- Pork or Turkey Cutlets: This exact dredging and baking method works beautifully with thin-cut pork chops or turkey cutlets. Keep the baking temperature the same, but adjust the time slightly depending on the thickness of the meat.
Common Mistakes to Avoid
- Not pounding the chicken to an even thickness: If one side of your cutlet is half an inch thick and the other side is a quarter-inch thick, the thin side will dry out completely before the thick side is safely cooked through. Take the extra two minutes to pound them to a uniform 1/4-inch thickness.
- Skipping the flour dredge: The flour is what absorbs the surface moisture of the chicken and gives the egg something to cling to. Without the flour layer, the egg wash will slide off, taking your beautiful crispy breading with it.
- Using wet breadcrumbs: Ensure your toasted breadcrumbs have cooled down slightly before mixing in the cheese and spices. If they are steaming hot, they can melt the cheese prematurely or create condensation, which ruins the crisp texture.
- Crowding the baking sheet: If the cutlets are touching or overlapping on the wire rack, they will trap steam between them. This leads to soft, soggy patches. Leave at least half an inch of space between each cutlet.
- Relying solely on visual cues: Because the breadcrumbs are pre-toasted, the cutlets will look perfectly cooked within 5 minutes of entering the oven. Always use a digital meat thermometer to ensure the internal temperature has reached the safe standard of 165°F (74°C), as outlined in the USDA food safety guidelines.
How to Store, Freeze, and Reheat
While these cutlets are best enjoyed fresh out of the oven, they make fantastic leftovers for meal prep. The key is storing and reheating them properly so they do not lose their signature crunch.
Storing in the Refrigerator
Allow the cooked cutlets to cool completely to room temperature on the wire rack. If you pack them into a container while they are still warm, the steam will condense and make the breading soggy. Once cool, layer the cutlets in an airtight container, separating the layers with parchment paper. They will keep well in the fridge for up to 4 days.
Freezing Instructions
You can freeze these cutlets either raw (fully breaded) or fully cooked. To freeze cooked cutlets, place the cooled cutlets on a baking sheet in a single layer and freeze for 2 hours until solid. Transfer them to a heavy-duty freezer bag, squeezing out as much air as possible. They will keep for up to 3 months. To cook from frozen, bake at 400°F (205°C) for 15-20 minutes until heated through.
Reheating for Maximum Crispiness
Never use the microwave to reheat breaded chicken cutlets; it will turn the crust soft and rubbery. Instead, use one of these two superior methods:
- Oven/Toaster Oven Method: Preheat your oven to 375°F (190°C). Place the cutlets on a wire rack set inside a baking sheet and bake for 8 to 10 minutes until hot and sizzling.
- Air Fryer Method: Place the cutlets in the air fryer basket in a single layer. Air fry at 365°F (185°C) for 3 to 4 minutes, flipping halfway through, until the crust is re-crisped.
Meal Prep and Serving Suggestions
These versatile crispy oven baked chicken cutlets serve as an incredibly flexible canvas for a variety of quick weeknight meals. Here are some of our favorite ways to serve them:
- The Classic Italian Plate: Serve the hot cutlets alongside a mound of spaghetti tossed in a rich marinara sauce, finished with extra Parmigiano-Reggiano and fresh basil.
- Chicken Parmesan Shortcut: During the last 3 minutes of baking, top each cutlet with a spoonful of warm marinara sauce and a slice of fresh mozzarella cheese. Return to the oven until the cheese is melted and bubbling.
- Milanese Style: Keep it light and elegant by topping the crispy cutlets with a simple salad of baby arugula, halved cherry tomatoes, shaved Parmesan, and a bright squeeze of fresh lemon juice with a drizzle of extra virgin olive oil.
- The Ultimate Cutlet Sandwich: Layer a cold or hot cutlet onto a toasted ciabatta roll with garlic aioli, sliced provolone cheese, roasted red peppers, and fresh arugula.
Frequently Asked Questions
Can I make this recipe without eggs?
Yes. If you have an egg allergy or simply ran out, you can substitute the egg wash with heavy cream, buttermilk, or even a thin layer of mayonnaise brushed over the chicken. Mayonnaise is an excellent binder because its fat content helps brown the breadcrumbs even further while keeping the chicken moist.
Why is my breading falling off the chicken after baking?
Breading typically falls off for three reasons: the chicken was too wet before dredging, the excess flour wasn't shaken off, or the cutlets were flipped too aggressively. Ensure you pat the chicken dry with paper towels, shake off any loose flour, and avoid flipping the cutlets during baking (which isn't necessary when using a wire rack anyway).
Do I have to use Panko breadcrumbs?
While you can use 100% traditional fine breadcrumbs, your cutlets will not be nearly as crispy. Panko breadcrumbs have a larger, flaky surface area that absorbs less moisture, which is the key to achieving that fried-like crunch in an oven environment.
Can I use chicken thighs instead of chicken breasts?
Absolutely. You can use boneless, skinless chicken thighs. However, because thighs are naturally more uneven in shape, you will need to pound them carefully to a uniform thickness. They may also require an extra 3 to 5 minutes of baking time due to their higher fat content.
How do I keep the chicken from drying out?
The best way to prevent dry chicken is to avoid overcooking it. Because cutlets are pounded thin, they cook incredibly fast. Use a digital instant-read thermometer and pull the chicken out of the oven as soon as the thickest part of the cutlet registers 165°F (74°C).
Do I need to flip the chicken halfway through baking?
No. Because we are baking the chicken on an elevated wire rack, the hot air circulates underneath the cutlets, cooking and crisping both sides evenly. Flipping the chicken mid-bake is not only unnecessary, but it also increases the risk of knocking off some of the delicate crispy breading.
With this reliable oven-baked method, you can enjoy all the crispy, golden glory of a classic Italian chicken cutlet any night of the week. By using a wire rack and pre-toasting your breadcrumbs, you get perfect results with minimal cleanup. Give this recipe a try tonight, and transform your weeknight dinner game with ease.

Founder of Simple Skillet
Aycan tests every recipe on Simple Skillet at home before it's published — real ingredients, real timing, no filler.